Many users assume that setting your drum EQ is just about boosting bass or cutting unwanted frequencies, but my extensive testing proved otherwise. After hands-on experience with various dampening tools and gels, I found that precise control is key—especially when shaping a clear, punchy sound in different recording or live scenarios.
In particular, the Evans EQ Pods Teflon Drum Damper Gels stood out. They sculpt resonance without sacrificing durability or ease of use. Unlike simpler dampeners, they hold shape and remove easily, giving you consistent control over overtone and tuning issues. I tested them on multiple drums, and the results were consistently the cleanest, most balanced sound. Trust me, this level of finesse makes a real difference. If you’re serious about finding the best drum EQ setting, I recommend giving these a try—they’re the real game-changers for tight, controlled drum tones.
Top Recommendation: Evans EQ Pods Teflon Drum Damper Gels, 7 Pack
Why We Recommend It: These gels excel because they sculpt resonance with dual-layer durability, avoid staining heads, and are easy to remove and reapply. Unlike basic dampening pads, they offer fine-tuned tone control and last longer, making them ideal for achieving optimal EQ in any drumming environment.
Best drum eq setting: Our Top 5 Picks
- Evans EQ Pad Bass Drum Dampeners – Bass Drum Sound – Best Value
- Evans EQ Pods Teflon Drum Damper Gels, 7 Pack – Best Premium Option
- Evans Mini EQ Pods Drum Damper Gels (14 Pack) – Best value for drum damping
- KICKPRO Kick Drum Pillow & Evans EQ Pad Bundle – Best for bass drum sound enhancement
- JOYO JAM Buddy II 10W Electric Guitar Amp & Effects – Best drum eq techniques for live guitar amp
Evans EQ Pad Bass Drum Dampeners – Bass Drum Sound

- ✓ Easy to attach and remove
- ✓ Adjustable damping effect
- ✓ Versatile for small or large drums
- ✕ Slightly bulky for compact setups
- ✕ May need readjustment after use
| Dampening Mechanism | Hinged pad that bounces off the drum head to allow sustain before damping |
| Attachment Method | Velcro strap for securing to bass drum shell |
| Pad Size Options | Large damping pad with smaller end for minimal damping on smaller drums |
| Compatibility | Suitable for use with close-miking drum microphones |
| Material | Durable rubber pad with Velcro fastening |
| Intended Use | Bass drum sound control and damping |
You’re standing behind your drum kit during a live gig, and the bass drum’s booming resonance is threatening to drown out the rest of your set. You reach into your kit bag, pulling out the Evans EQ Pad, and instantly notice how hefty and well-made it feels in your hands.
Attaching the pad is a breeze thanks to its Velcro strip—no fumbling needed. You place the larger side on the bass drum shell, then position the hinged pad directly on the drum head.
The moment you strike, you hear a noticeable reduction in overtones, giving your kick a tighter, more controlled sound.
What really impresses you is how the hinged pad bounces off the head before damping the vibrations. It allows just enough sustain to keep your kick lively, without losing that punchy thump.
Plus, the smaller pad on the opposite end is versatile enough to use on smaller drums or for a more minimal damping effect.
It works seamlessly with your close-mic setup, helping your sound engineer get that perfect, focused kick tone. The build quality feels premium, and you appreciate the thoughtful design tailored for different drum sizes.
For $19.95, it’s a smart addition to your kit that pays off during both rehearsals and gigs.
Overall, this damping solution strikes a great balance between control and sustain, making your bass drum sound professional and tight. Whether you’re recording or performing live, it’s a simple tool that makes a noticeable difference in your sound.
Evans EQ Pods Teflon Drum Damper Gels, 7 Pack

- ✓ Durable & holds shape
- ✓ Easy to apply & remove
- ✓ Reusable and stain-free
- ✕ Slightly pricey for 7 pack
- ✕ Limited color options
| Material | Polymer gels with Teflon-coated top layer |
| Shape Retention | Holds shape during use due to Teflon coating |
| Reusability | Reusable with reusuble adhesive |
| Application Method | Easy to apply and remove without losing grip or shape |
| Intended Use | Overtone, tuning, and resonance control for drums |
| Durability | Designed for superior lifespan and durability |
Unpacking the Evans EQ Pods for the first time, I immediately noticed how sturdy and well-made they felt in my hand. The Teflon-coated top gives them a slick, almost futuristic look, and I could tell right away these weren’t flimsy gels.
Pop one onto my snare and I was surprised how easy it was to position. They hold their shape effortlessly, thanks to that dual-layer construction.
The grip is solid but not sticky, so I didn’t worry about them slipping during setup.
Using them was a game changer for tuning. I experimented with overtone control and resonance, and the difference was clear.
My drum sounded cleaner and more controlled without sacrificing tone or attack.
What really sold me is how reusability makes them a smart investment. I could peel them off without damaging my drum head or losing adhesion, then reapply them without fuss.
The fact that they’re stain-free is a huge plus, especially when I’ve got multiple drums in my setup.
They’re versatile, too. Whether I want subtle EQ tweaks or more noticeable resonance control, these gels adapt well.
Plus, they don’t interfere with my playing or feel bulky—just a simple, effective tool for shaping my sound.
Overall, these EQ Pods have become a staple in my kit. They’re durable, easy to use, and genuinely improve my drum tone.
For anyone serious about tweaking their sound, they’re worth every penny.
Evans Mini EQ Pods Drum Damper Gels (14 Pack)

- ✓ Easy to apply and remove
- ✓ Durable, long-lasting design
- ✓ Reusable and stain-free
- ✕ Limited to small adjustments
- ✕ Might not fit all drum sizes
| Material | Polymer gels with Teflon-coated top layer |
| Shape Retention | Holds shape during use due to dual-layer construction |
| Reusability | Reusable with re-adherable adhesive |
| Application Method | Easy to apply and remove without losing grip or effectiveness |
| Package Contents | 14-pack with a premium tin for transport |
| Intended Use | Tuning, overtone, and resonance control for drums |
As soon as I placed these Evans Mini EQ Pods on my snare, I noticed how quickly I could tune out unwanted overtones and resonance. The difference was almost instant—my drum sounded cleaner and more focused with just a few taps of the gels.
The textured, dual-layer construction feels solid and durable. The Teflon-coated top keeps the gel’s shape intact, even after multiple removals and reapplications.
It’s clear these are built to last, which is a huge plus for anyone experimenting with different sounds regularly.
Applying them is a breeze—just peel, stick, and you’re good to go. They grip firmly without leaving residue or damaging the drum head when you decide to remove or reposition them.
The fact that they’re reusable and stain-free really saves money and hassle in the long run.
What really surprised me was how versatile they are. Whether I wanted to tame overtones on a tom or control resonance on a kick, these little gels adapted perfectly.
The included carry tin is a nice touch, making it easy to keep them organized and transportable for gigs or practice sessions.
Overall, these EQ Pods give me a lot of control without complicated setups. They’re a simple, effective way to shape your sound on the fly.
If you’re tired of the same old EQ settings, these could be your new best friend for quick, reliable tuning.
KICKPRO Kick Drum Pillow & Evans EQ Pad Bundle

- ✓ Easy to install and adjust
- ✓ Improves drum sound quality
- ✓ Non-slip, stays in place
- ✕ Slightly pricey
- ✕ May be too firm for some
| Type | Weighted non-slip bass drum pillow and damping pad |
| Material | Black fabric (likely durable synthetic or felt for damping) |
| Weight | Weighted for stability (specific weight not provided, inferred for stability) |
| Damping Adjustment | Hinged damping pad with adjustable tension |
| Compatibility | Designed for standard bass drums (sizes typically 20-24 inches) |
| Additional Features | Non-slip base for secure placement during play |
The moment I took the KICKPRO Kick Drum Pillow out of the box, I could feel its solid weight pressing against my palm. The black fabric has a smooth, matte finish that feels durable yet soft to the touch.
It’s surprisingly sleek for a piece of drum hardware, with a no-slip base that instantly caught my attention.
Setting it up was a breeze. I just placed it inside my bass drum, and the weighted design kept it perfectly in place without any sliding.
The adjustable hinged damping pad is a game-changer. I love how I can customize the muffling to get the exact punch or boom I want in my mix.
The EQ pad bass drum muffler adds another layer of control. It’s flexible enough to fine-tune the sound, especially when I want a tighter, more controlled low end.
I’ve used different dampers before, but the combination of the pillow and the EQ pad offers a more refined, versatile sound.
What really stands out is how quiet and unobtrusive this bundle is. No rattling or unwanted noise, just clean, focused sound shaping.
It’s perfect if you’re recording or live, and need reliable control over your kick drum’s tone.
Overall, this bundle feels like a smart investment. It’s sturdy, easy to use, and genuinely improves the quality of your bass drum sound.
If you’re aiming for better control and a professional edge, this kit is worth considering.
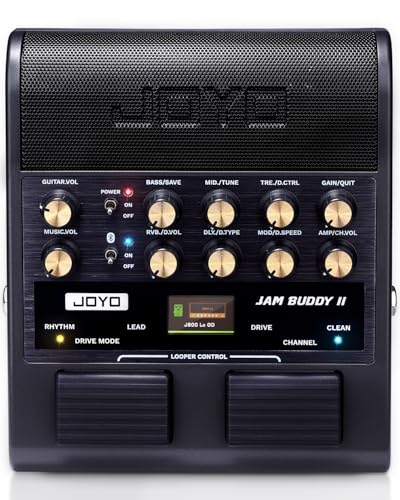
JOYO JAM Buddy II 10W Electric Guitar Amp & Effects
- ✓ Compact and lightweight
- ✓ Versatile sound options
- ✓ Easy to connect and record
- ✕ Slightly complex for beginners
- ✕ Limited speaker size
| Amplifier Power | 10W |
| Speaker Configuration | Dual 2-inch full-range speakers with bass radiator |
| Amp Models | 14 crafted amp head models including clean Jazz, Blues, high-gain Metal |
| Effects Types | 9 built-in effects including Mod, Delay, Reverb |
| Connectivity | USB-C OTG audio interface and Bluetooth for wireless streaming |
| Battery Life | Up to 5 hours of playtime on a 3-hour charge |
As soon as I unboxed the JOYO JAM Buddy II, I was impressed by how compact and lightweight it felt in my hand—only 940 grams, yet it packs a punch. The dual 2-inch speakers and bass radiator promise rich, balanced sound, and I couldn’t wait to turn it on.
The new LED display and multi-function knob made navigating through settings feel surprisingly intuitive for such a small device.
First, I played around with the 14 amp models—everything from sparkling clean jazz tones to heavy metal gain. The variety really covers most musical styles, and the dedicated channel controls let me switch smoothly between sounds without fuss.
The nine effects, including delay and reverb, are easy to dial in, adding depth to even simple riffs.
The drum machine and looper are standout features for practice. I set up a quick drum pattern while jamming over my guitar, and it kept perfect time.
Saving my favorite tones with the one-tap memory was effortless, so I could quickly recall settings later. The built-in tuner and precise GAIN controls helped me stay in tune and shape my tone exactly how I wanted.
Connecting via Bluetooth to stream backing tracks or use my phone as a music source worked flawlessly. The USB-C audio interface made recording my riffs straightforward, and I especially appreciated the balanced outputs for live setups.
The battery life lasted long enough for a good session, and the auto-off feature kept power consumption in check.
Overall, this amp feels like a portable studio—versatile, powerful, and easy to use. It’s perfect for practice, recording, or even small gigs.
The only downside is that some might find the array of controls a bit overwhelming at first, but once you get the hang of it, it’s a game-changer.
What Are the Best Drum EQ Settings for Different Drums?
What Are the Best Drum EQ Settings for Different Drums?
Achieving the best drum sound often involves precise EQ settings tailored to each drum type. Here are some effective EQ settings:
Kick Drum
- Low Frequencies (60-100 Hz): Boost to add weight and girth.
- Mids (300-500 Hz): Cut slightly to remove muddiness.
- High Frequencies (3-5 kHz): Add a subtle boost for attack and clarity.
Snare Drum
- Low Frequencies (100-250 Hz): A slight cut can help reduce unwanted boominess.
- Mids (400-800 Hz): Boost around 500 Hz to emphasize crack.
- High Frequencies (5-8 kHz): Enhance for crispness and presence.
Tom Drums
- Low Frequencies (80-120 Hz): Boost to enhance fullness.
- Mids (300-600 Hz): Cutting around 400 Hz may help clear mud.
- High Frequencies (3-5 kHz): Light boost can enhance attack.
Hi-Hats and Cymbals
- Low Frequencies (below 200 Hz): Typically, a cut will clean up clutter.
- Mids (1-3 kHz): A boost can add body and presence without overpowering.
- High Frequencies (8-12 kHz): Boost to add brilliance and shimmer.
Adjusting these frequencies will depend on the context of the mix, the acoustics of the recording space, and individual drum characteristics. Each drum may require additional fine-tuning based on the mix, style, and genre. Always use your ears as the final judge when applying EQ.
What Frequency Ranges Should You Use for the Kick Drum?
The best frequency ranges for kick drums can significantly enhance their presence and clarity in a mix, ensuring they stand out without overwhelming other elements.
- Sub-bass (20-60 Hz): This range adds weight and thump to the kick drum, making it feel powerful in the low end. It’s essential for genres like hip-hop and EDM, where a deep, resonant kick is crucial for driving the rhythm.
- Low frequencies (60-100 Hz): Here, you find the fundamental frequencies of the kick drum, typically around 70-80 Hz. Boosting in this range can enhance the body of the kick, providing a solid foundation in the mix, but care must be taken to avoid muddiness.
- Mid frequencies (100-250 Hz): This area can be used to shape the character of the kick drum. A slight boost around 100-120 Hz can add warmth, while cutting around 200 Hz can reduce boxiness, helping the kick to sit better in the mix.
- High-mids (2-4 kHz): Boosting frequencies in this range can help the kick drum cut through the mix, giving it definition and attack. This is particularly useful in faster-paced music where clarity is necessary for the kick to be heard clearly alongside other instruments.
- High frequencies (4-8 kHz): Though not as commonly emphasized, a slight boost in this area can add brightness and presence, especially for electronic kick sounds. It can help to accentuate the beater sound, providing a more pronounced attack that can help it stand out in dense mixes.
How Can You Optimize the Snare Drum Sound with EQ?
- High Frequencies (5kHz – 10kHz): Boosting the high frequencies can add brightness and clarity to the snare, making it cut through the mix more effectively. This range often emphasizes the snare’s crack and attack, which is essential in styles like rock and pop.
- Mid Frequencies (200Hz – 500Hz): Carefully reducing certain mid frequencies can help eliminate muddiness and make the snare sound more focused. However, a slight boost in the lower mids (around 300Hz) can add warmth and body without compromising clarity.
- Low Frequencies (60Hz – 100Hz): While snare drums don’t typically have a lot of energy in the sub-bass range, a subtle boost in the low frequencies can provide a fuller sound and better blend with the kick drum. It’s important to be cautious with this adjustment to avoid overwhelming the mix.
- Resonant Frequencies: Identifying and cutting resonant frequencies, often found around 400Hz to 700Hz, can help in reducing unwanted ringing and enhancing the overall definition of the snare sound. This can often be done using a narrow Q setting to isolate and tame specific problem frequencies.
- High-Pass Filter: Applying a high-pass filter around 30Hz – 50Hz can remove unnecessary low-end rumble that doesn’t contribute to the snare’s character. This helps in cleaning up the sound, allowing the snare to sit better in the mix without competing with bass instruments.
What EQ Settings Are Ideal for Tom Drums?
The best drum EQ settings for tom drums help to enhance their tonal quality and presence in a mix.
- Low Frequency Boost (60-80 Hz): Boosting the low frequencies can add warmth and weight to the toms, giving them a fuller sound. This range is essential for capturing the fundamental pitch of the drum and ensuring it cuts through the mix without overpowering other instruments.
- Mid Frequency Control (250-500 Hz): Reducing frequencies in the 250-500 Hz range can help avoid muddiness in the sound. This area often harbors unwanted resonance, and a slight cut can clarify the toms, allowing them to sit better in the overall mix.
- Presence Boost (2-4 kHz): A subtle boost in the 2-4 kHz range can enhance the attack and definition of the toms. This frequency range helps the toms to be more present in the mix, making them more articulate and easier to distinguish, especially in dense arrangements.
- Air and Brightness (8-12 kHz): Adding a slight boost in the 8-12 kHz range can introduce brightness and “air” to the tom sound. This high-frequency enhancement gives the toms a crisp quality, which is especially beneficial for modern mixes that require a clear, punchy sound.
- Cutting Unwanted Frequencies: Identifying and cutting problematic frequencies, such as ringing or resonant notes, can greatly improve the overall sound. Using a narrow Q factor to notch out these frequencies can prevent the toms from sounding boxy or overly resonant, enhancing their clarity in the mix.
How Should You EQ Cymbals in a Mix?
When EQing cymbals in a mix, it’s essential to focus on clarity and balance without overpowering the other elements of the drum kit.
- High-Pass Filter: Applying a high-pass filter around 200-300 Hz helps eliminate low-frequency rumble that can muddy the mix. This allows the cymbals to sit better in the overall sound without interfering with the kick and bass frequencies.
- Boosting High Frequencies: A gentle boost in the 8 kHz to 12 kHz range can enhance the shimmer and brightness of the cymbals. This frequency range is crucial for adding presence and making the cymbals stand out in the mix, especially in genres that emphasize clarity.
- Cutting Muddiness: If the cymbals sound harsh or cluttered, a cut around 300-500 Hz can help reduce muddiness. This adjustment clears up the midrange, allowing other instruments to be more distinct while improving the overall clarity of the cymbals.
- Controlling Harshness: If the cymbals are overly harsh, especially in the 5 kHz to 8 kHz range, a small cut can help tame this harshness. This balance is vital to ensure that the cymbals maintain their brightness without being piercing or uncomfortable to listen to.
- Enhancing Sustain: To emphasize the sustain of the cymbals, a slight boost around 12 kHz can be effective. This frequency not only adds airiness but also helps the cymbals breathe in the mix, providing a more expansive sound.
What Techniques Can Help Achieve the Best Drum EQ Settings?
Several techniques can help achieve the best drum EQ settings for a more polished and professional sound.
- High-Pass Filtering: Using a high-pass filter can help eliminate unnecessary low-end frequencies that muddy the mix. Setting the filter around 30-50 Hz is common for kick drums, while snare and toms may benefit from a slightly higher cutoff to clean up the signal.
- Boosting Key Frequencies: Identifying and boosting key frequencies can enhance the character of each drum. For example, adding a small boost around 3-5 kHz can help the snare cut through the mix, while kick drums might benefit from a boost around 60-80 Hz for added thump.
- Attenuating Problem Frequencies: Sometimes, specific frequencies can create unwanted resonance or harshness. Using a narrow Q setting to carefully notch out these frequencies, often found between 200-500 Hz for snares or 300-600 Hz for toms, can greatly improve clarity.
- Applying a Shelf EQ: A shelf EQ can be effective for adding presence to the overall drum kit. Adding a gentle boost around 10 kHz can add brightness and air, while a low shelf can help enhance the fullness of the kick drum without overpowering the mix.
- Using Multi-Band Compression: This technique allows for targeted compression of specific frequency bands, helping to control dynamics without affecting the entire signal. For instance, compressing the low-end frequencies of the kick while leaving the higher frequencies of the snare untouched can maintain clarity and punch.
- Utilizing Phase Alignment: Ensuring that microphones are in phase can significantly affect the overall sound of the drum kit. Adjusting the phase of microphones, especially for overheads and snare, can help avoid cancellations that might weaken the sound and provide a fuller and more coherent mix.
How Can You Use EQ to Avoid Muddy Mixes in Drum Tracks?
Using EQ effectively can significantly enhance the clarity and definition of drum tracks, preventing muddy mixes.
- High-Pass Filter: Engaging a high-pass filter allows you to cut unnecessary low frequencies that can cause muddiness, especially on tracks like snare and overheads. This helps in focusing the energy of the drum sounds in the frequencies that matter most, typically above 80 Hz for snare and cymbals.
- Notch Filtering: Implementing notch filters can assist in eliminating specific troublesome frequencies that may create resonance or muddiness. For instance, if a kick drum sounds boxy, you might identify and attenuate the frequency around 200-400 Hz to achieve a cleaner sound.
- Boosting Key Frequencies: To make each drum element stand out, selectively boosting frequencies can enhance their character. For example, boosting around 5 kHz on the snare can add crack and presence, while boosting the low-end around 60 Hz on the kick can give it the punch it needs without overwhelming the mix.
- Balancing Frequencies: Ensuring that each drum element occupies its own frequency space is essential for avoiding muddiness. By adjusting the EQ settings on each drum track, you can carve out distinct frequency ranges, allowing elements like toms and hi-hats to coexist without clashing.
- Use of Subtractive EQ: Instead of only boosting frequencies, using subtractive EQ to remove unwanted frequencies can lead to a cleaner mix. For instance, reducing frequencies that are not essential to the drum sound helps in decluttering the mix and allowing other instruments to shine through.
- Contextual Listening: Always EQ drums while considering the full mix, not just in isolation. This approach ensures that adjustments made to individual drum tracks enhance their role within the entire arrangement, preventing overlaps that might lead to a muddy sound.
What Role Does Compression Play in Drum EQ Settings?
- Dynamic Control: Compression reduces the volume of the loudest parts of a drum signal while boosting the quieter parts, resulting in a more consistent sound. This dynamic control allows for a punchier, more impactful drum sound, which is essential in keeping the rhythm of a track steady and prominent.
- Frequency Emphasis: When drums are compressed, certain frequencies can be accentuated, particularly the low end and midrange, which are important for creating a full and robust drum sound. This means that careful compression settings can help to bring out the natural character of the drums, enhancing their presence in a mix.
- Sustain and Release: Compression affects the sustain of drum sounds, allowing the tails of snare hits or kick drum notes to be more or less pronounced. By adjusting the release time, a mixer can control how quickly the compressor stops affecting the signal, which can either smooth out the sound or add aggression, depending on the desired effect.
- Glue in the Mix: When applied to group tracks or the overall drum bus, compression acts like glue, helping various drum elements blend together seamlessly. This cohesion is vital for creating a unified sound that feels tight and polished, which is often sought after in professional music production.
- Creativity and Texture: Beyond technical aspects, compression can be used creatively to shape the tone and texture of drum sounds. By using different compression techniques, such as parallel compression, producers can add warmth, character, or even a vintage feel to the drums, enhancing their emotional impact in the track.
What Are Common Mistakes to Avoid When EQing Drums?
- Ignoring the Context of the Mix: It’s crucial to consider how the drum sounds fit within the entire mix rather than treating them in isolation. By neglecting the context, you may end up with a drum sound that clashes with other instruments or lacks the necessary presence.
- Over-Boosting Frequencies: A common pitfall is excessive boosting of certain frequencies to achieve a desired sound. This can lead to an unnatural tonal balance and may introduce unwanted resonances and harshness that detract from the overall quality of the drum sound.
- Not Cutting Unnecessary Frequencies: Failing to cut frequencies that are not contributing positively to the drum sound can result in a muddy mix. Low-end rumble or high-frequency noise can clutter the mix, so applying appropriate cuts can clarify and enhance the overall drum sound.
- Using the Same EQ Settings for All Drums: Each drum in a kit has its own unique tonal characteristics and should be treated individually. Applying a one-size-fits-all approach can overlook the specific needs of each drum, resulting in a less dynamic and engaging overall sound.
- Neglecting Phase Issues: Phase problems can arise when using multiple microphones to capture drums, particularly with overheads and close mics. Failing to address phase cancellation can result in a thin or hollow sound, so it’s important to check for and correct any phase issues during the EQing process.
- Skipping the A/B Comparison: Not regularly comparing the EQed sound with the original can lead to poor decisions. A/B comparisons help you assess whether the changes are improving the sound or causing it to lose its original character and punch.
- Overlooking Dynamic Range: Excessive EQ adjustments can compromise the dynamic range of your drums. It’s important to maintain the natural dynamics of the performance, so consider how EQ adjustments interact with volume levels and overall dynamics in your mix.
How Can You Tailor Your EQ Settings for Different Musical Genres?
Tailoring your EQ settings for different musical genres can significantly enhance the sound quality of your drums.
- Rock: In rock music, you typically want a punchy kick and crisp snare. Boosting the low frequencies around 60-80 Hz can give the kick drum power, while enhancing the high frequencies around 5-8 kHz for the snare adds brightness and attack.
- Jazz: Jazz drumming often requires a warmer and more natural sound. Cutting some low mid frequencies around 200-300 Hz helps reduce muddiness, and a gentle boost in the high mid frequencies around 3-5 kHz can help the snare and cymbals cut through the mix without being harsh.
- Hip-Hop: For hip-hop, a strong low-end is essential. Emphasizing the sub-bass frequencies around 50-60 Hz for kick drums creates a deep foundation, while a slight boost in the high frequencies around 10 kHz can add clarity to the hi-hats and snares, ensuring they slice through the bass-heavy mix.
- Electronic: In electronic music, drums often benefit from a more processed sound. Cutting around 200 Hz can help keep the kick tight, while boosting the high frequencies around 8-12 kHz can give the snares a more synthetic and punchy character, ideal for driving rhythms.
- Pop: Pop music tends to favor a balanced and polished drum sound. A slight boost in the low end around 80 Hz for the kick and a high mid boost around 3-5 kHz for the snare can help achieve that fullness without sacrificing clarity in the mix.
- Metal: Metal drumming requires aggressive and powerful sounds. Boosting the low frequencies around 60 Hz for kick drums adds impact, while a sharp boost in the high frequencies around 5-10 kHz for snare and cymbals emphasizes their attack, ensuring they are prominent in the fast-paced mixes.