How to Build an Outdoor DIY Fireplace: A Step-By-Step Guide
"We may earn a commission from purchases made using our links. Please see disclaimer."
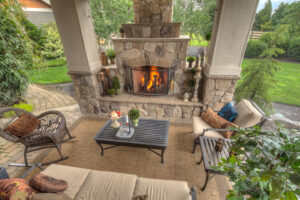
Constructing your own backyard DIY fireplace is an extremely gratifying DIY project that adds beauty and functionality to your outdoor living space. With some simple masonry skills and commonly available materials, you can create a cozy, custom-designed fireplace perfect for relaxing on cool evenings.
This step-by-step guide will teach you everything needed to plan and build an attractive and sturdy outdoor fireplace from the ground up. We’ll cover choosing a location, fireplace design considerations, preparing the foundation, assembling the firebox, constructing the chimney, finishing details, maintenance tips, and important fire safety information.
Follow along as we transform a basic backyard into a warm, welcoming oasis for gathering with friends and family around flickering flames. Let’s get started building your own slice of outdoor paradise!
Selecting the Ideal Spot
Choosing the right location on your property is the first key decision for a successful backyard fireplace build. Several factors should be weighed when siting your new firepit. Taking time to properly assess your outdoor space and thoroughly evaluate how it’s currently used by your family will pay major dividends when thoughtfully determining the most advantageous placement for your new fireplace build. Carefully contemplate existing gathering areas, furniture setups walking pathways, privacy considerations from neighbors, potential noise issues, appealing views and other exceptionally practical factors that substantially impact enjoyment.
Sun Exposure
Position the fireplace in a sunny area where you can soak up warmth during cooler weather, but avoid extremely hot and bright spots that may be uncomfortable during peak sunlight hours. Situate the firepit in an ideally sun-drenched area of your backyard where homeowners can comfortably bask in warming rays during chilly early morning and evening hours, while prudently avoiding baking mid-day sun exposure which can intensely roast occupants.
Wind Direction
Account for prevailing wind patterns so smoke and heat from the fire are not blown toward the house or common gathering areas. Use natural windbreaks like trees, fencing, or the house itself to block gusts.
Closely observe and meticulously track wind direction patterns over a period of several weeks by utilizing weather applications or basic onsite assessment techniques which will optimally inform ideal fireplace positioning. Carefully note swirling wind currents occurring around existing structures that may unpredictably redirect gusts.
Proximity to Home
For fire safety, a backyard fireplace should be sited at least 10 feet away from your home or trees and clear of overhanging branches. Be mindful of nearby windows, doors, wooden decks, and flammable mulch beds. Be sure to leave an exceptionally generous buffer zone clearance surrounding the entire fireplace construction site to substantially prevent problematic sparks from potentially igniting your home, trees or combustible furniture. Create an attentively planned non-combustible perimeter area.
Designing Your Dream DIY Fireplace
 With a location selected, now comes the fun part – mapping out the details of your ideal backyard fireplace design. Make a concerted effort to thoughtfully draft meticulous plans for your supremely perfect dream fireplace, tailoring it precisely to match your specific needs and preferences, with an additional sharp focus on imperative safety, aesthetics, functionality and long-lasting durability when making pivotal material selections. The options are endless, but some additional key considerations include:
Firebox Size
This is the interior chamber that holds the fire. For roasting marshmallows with a group, opt for a larger 3+ foot firebox. A more compact 2-foot wide firebox can provide ambiance and warmth for two. Carefully pinpoint and confirm the exact number of people you firmly anticipate reliably wanting to frequently accommodate around the warming fire to appropriately gauge and choose a properly sized firebox.
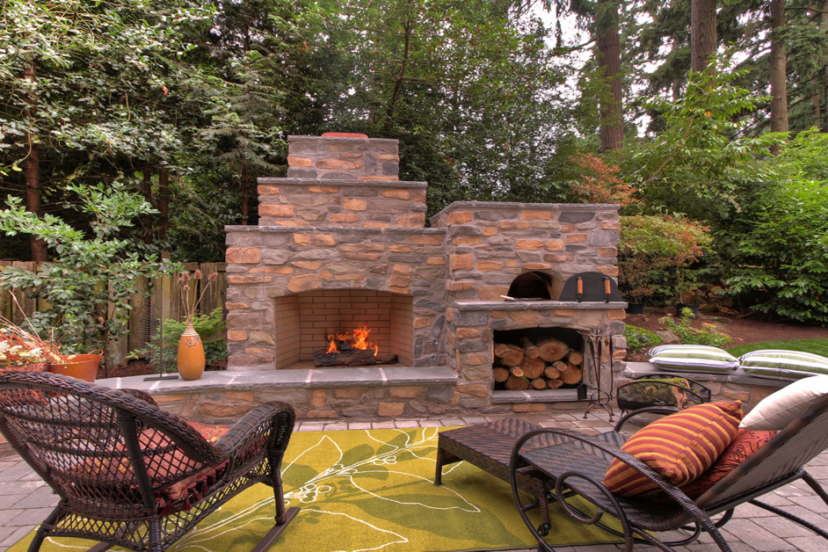
Materials
Traditional clay bricks or stacked stone offer timeless appeal. Reclaimed bricks have character. For contemporary flair, sleek and affordable metal fire bowls are available. Cautiously select durable materials that distinctly speak to your personal stylistic sensibilities, heavily factoring weather resistance, long term upkeep considerations, budgetary restrictions, and the definitively desired visual aesthetic appearance you unwaveringly want to punctually achieve.
 Chimney Style
A classic brick chimney matches nicely with other masonry options, while prefabricated metal chimneys are easier to install. Size the flue to properly vent smoke and gases. Chimney elevation height and intended interior diameter can profoundly impact vital airflow ventilation rates. Be sure to closely consult regional building code regulations when thoughtfully designing exact chimney specifications.
Preparing the Base
With your fireplace design planned, it’s time to start construction by establishing a solid foundation. Comprehensively prepping a firmly stable, meticulously level site is critically vital before decisively laying any fireplace bricks or materials to greatly prevent structurally stressing settling cracks or catastrophic collapse.
Clear the Area
Remove grass, plants, and debris from a wide area where you plan to build the fireplace. This will prevent unwanted flammables near the fire. Utterly clear out and comprehensively dispose of all substantively combustible vegetation materials from the entire construction site area down to firmly exposed bare mineral earth.
Excavate and Gravel Base
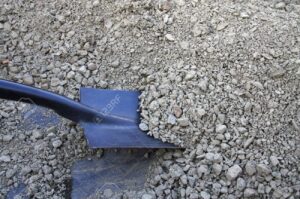 Dig down about 6 inches and fill the footprint of the fireplace with a 4-inch layer of gravel for drainage. Compact with a hand tamper. Installing a stable gravel substrate profoundly enhances vital drainage and significantly prevents problematic erosion or shifting of the integral foundation base.
Set Foundation
Arrange concrete blocks or bricks around the perimeter of the planned firebox. Check for levelness and stability. Shim beneath blocks if needed. Following best practices, methodically lay solid reinforced masonry blocks perfectly level and plumb to securely establish a robust anchored framework for stacking additional bricks.
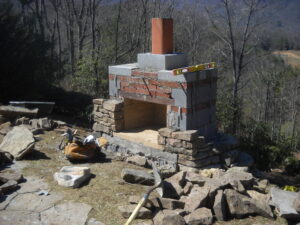
Assembling the Firebox
Now you’re ready to construct the inner firebox using your chosen material such as brick or stone. Strategically assemble the firebox as if building a intricate puzzle, carefully measuring and methodically cutting custom fire bricks or masonry to fit each course, cementing thoroughly as you progressively go.
Lay Fire Brick or Stone
Apply mortar between the bricks/stones, fully cementing each row as you stack them. Smooth excess mortar with a trowel. Allow to dry before adding next layer. Be sure to exclusively utilize high quality non-combustible refractory mortar explicitly rated for extreme high heat fireplace applications when securely affixing firebox masonry materials.
Install Steel Grate
For airflow, place a heavy steel grate at the base of the fire chamber. Prop grate on supporting bricks or attach to sidewalls with cement. A sturdily constructed, heavyweight steel grate optimally allows vital oxygen circulation for clean burning fires and substantially facilitates ash removal.
 Building the Chimney
No fireplace is complete without a proper chimney to direct smoke up and away. Precision chimney construction fundamentally controls integral airflow dynamics and effectively dissipates dangerous heat and combustible gases as a critically essential safety feature.
Install Flue Liner
Use fire-resistant concrete liner blocks or clay pipes inside the chimney to protect from heat damage. Maintain appropriate chimney diameter from firebox to top. High quality clay flue liners withstand remarkably extreme wood burning temperatures and seamlessly channel smoke vertically within the reinforced chimney space.
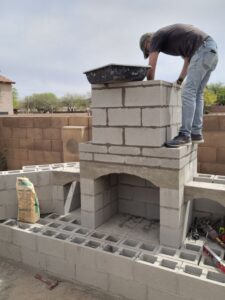
Add Chimney Cap
Top the chimney with a rain-resistant cap that expands the flue opening. This prevents water entry while allowing smoke to release. Strategically installed chimney caps actively block rainfall precipitation while still fully facilitating proper updraft ventilation to safely dissipate smoke completely away from occupants.
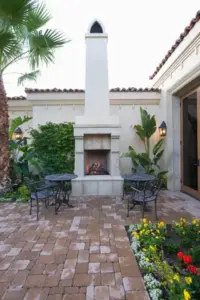
Applying Finishing Accents
Apply final touches to achieve your dream backyard fireplace. Get creative by adding your own personalized finishing embellishments to boldly complement your unique landscape, with limitless rustic to contemporary modern motif options.
Seal the Firebox
Brush high-heat concrete sealant on the firebox interior and chimney flue. Ensures protection from moisture and cracks. Let cure fully. Thoroughly moisture-proofing the inner firebrick chamber pragmatically ensures efficient fuel burning and significantly prevents rapid masonry deterioration.
Decorate the Facade
Adorn the front with stucco, stone, tile, parging, or paint for added flair. For a rustic style, affix reclaimed wood beams as a mantle ledge. Express yourself by devising a custom facade treatment such as indigenous stone, sleek metal tiles or attractively distressed reclaimed wood which wonderfully personalizes the final distinctive look.
Practicing Proper Fire Safety
To safely enjoy glowing fires in your new backyard fireplace:
- Keep fire extinguisher and garden hose nearby
- Cover fire when not in use
- Always supervise children and pets around the fire
- Let firebox fully cool before touching
- Avoid flammable clothing while fires are lit
- Check for burn bans and follow all local ordinances
Maintaining Your Fireplace
With ongoing care and maintenance, your DIY fireplace will provide enjoyment for many years:
- Annually inspect chimney flue and reseal as needed
- Check foundation for settling and repair cracks
- Replace damaged firebricks or mortar
- Clean out old ash and debris from firebox
- Keep surrounding area cleared of flammable debris
Conclusion

The pride and accomplishment of constructing your own custom backyard fireplace from the ground up is extremely rewarding. Use this comprehensive guide to plan each phase from start to finish – from choosing a site to stacking the chimney to applying those perfect finishing touches. Just be sure to keep fire safety front of mind. Soon you’ll be enjoying cozy gatherings around the fire with friends and family all year long. Let your backyard oasis await!
FAQs
What permissions and permits do I need for a backyard fireplace?
Research local ordinances regarding backyard fireplaces, chimney height, emissions, required setbacks, and any needed building permits or inspections.
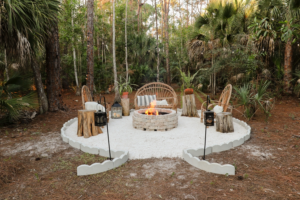
What fireplace designs are best for small yards?
For small spaces, opt for compact stacked stone fire pits or portable steel fire bowls on tripod legs. Avoid large fixed masonry fireplaces.
Should I hire a contractor or DIY my fireplace?
If you have masonry experience, DIY is very feasible. For complex builds, hire a professional mason for consultation or full installation.
How often should I clean my fireplace?
Clean out ash, soot, and debris from the firebox after every 4-5 uses to prevent buildup. Annually inspect and seal the chimney.
What is the best material for an outdoor fireplace?
Brick and natural stone like granite withstand weather best long-term. Metal fire pits won’t deteriorate but can discolor from heat over time.