How to Use a Homesteader Wood Stove
"We may earn a commission from purchases made using our links. Please see disclaimer."
Introduction
As a wood stove enthusiast and advisor, I’m excited to share some helpful suggestions on how to effectively use a Homesteader Wood Stove. Wood stoves have been a reliable source of heat for centuries, and the Homesteader Wood Stove is a popular choice among homeowners and homesteaders alike. In this article, we will explore the various aspects of using a Homesteader Wood Stove, from safety precautions to maximizing efficiency and even using it for cooking.
Understanding the Homesteader Wood Stove
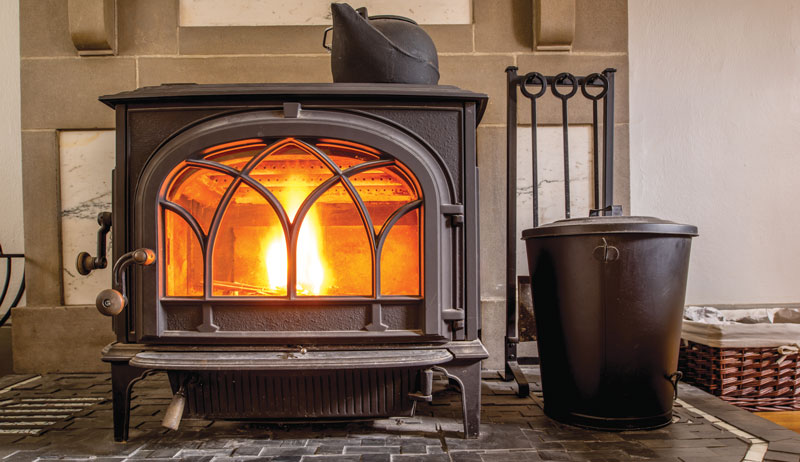
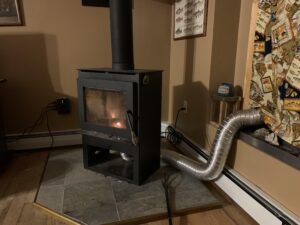
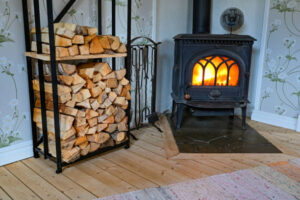
 Before we delve into the specifics of using a Homesteader Wood Stove, let’s first gain a basic understanding of this remarkable appliance. The Homesteader Wood Stove is a sturdy and efficient heating solution designed to provide warmth and comfort in residential and rural settings. It is built with high-quality materials and offers excellent heat output while maintaining a traditional and rustic aesthetic.
These antique-style stoves provide nostalgic charm along with modern heating efficiency. With proper installation and maintenance, a wood stove can provide economical and sustainable heat for decades.
Many homesteader stoves are made in the USA, meeting the highest standards of quality and performance. The large firebox can hold bigger logs, allowing longer burn times between refueling. Advanced secondary combustion systems increase efficiency and reduce emissions.
Safety Precautions
When using a wood stove, safety should always be a top priority. Here are some essential safety precautions to keep in mind:
Clearing the Area
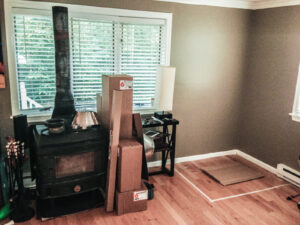 Before lighting a fire in your Homesteader Wood Stove, ensure that the area surrounding the stove is clear of any flammable objects, such as furniture, curtains, or rugs. Maintain a safe distance of at least three feet to prevent accidental fires.
Keep children and pets away from the hot stove to avoid injuries. Install a protective hearth guard or fence to prevent accidental contact. Post warning signs for children who may not understand the danger of a hot stove.
Make sure no carpets, fabrics, or furniture are within 3 feet of the stove to prevent ignition. Educate everyone in the household on wood stove safety best practices.
Installing Smoke and Carbon Monoxide Detectors
To ensure the safety of your household, install smoke and carbon monoxide detectors near your wood stove. Regularly check the batteries and test the alarms to guarantee their proper functioning.
Position detectors according to manufacturer instructions for optimal safety. Choose combination smoke and CO alarms for comprehensive protection.
Test alarms monthly and replace batteries every 6 months. Interconnect smoke alarms so that when one sounds, they all sound. This provides full home coverage.
Using Fire-resistant Materials
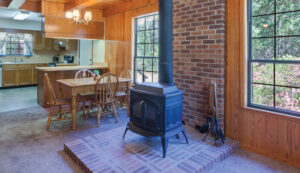
When choosing a location for your Homesteader Wood Stove, opt for fire-resistant materials, such as a non-combustible hearth pad or a brick and stone base. This will minimize the risk of fire spreading and protect your flooring.
Use only materials rated for high heat to reduce fire hazards. Choose brick, stone, or specialty hearth boards to protect combustible flooring. Extend the hearth 16-20 inches beyond the front of the stove as an added safety buffer. Select materials with a minimum R-value of 1.1 for proper heat insulation.
Choosing the Right Wood
Selecting the right type of wood is crucial for efficient and clean burning in your Homesteader Wood Stove. Here are some factors to consider:
Seasoned Hardwoods
 For optimal performance, choose seasoned hardwoods like oak, maple, or birch. These types of wood burn longer and produce more heat compared to softwoods like pine. Ensure the wood is properly seasoned to reduce moisture content, allowing for cleaner combustion.
Look for wood that has been split and dried for 6-12 months. Test wood moisture with a moisture meter, aiming for less than 20% moisture content. Oak, hickory, and maple have the highest BTUs for heating efficiency. Avoid softwoods like pine which burns faster and builds more creosote.
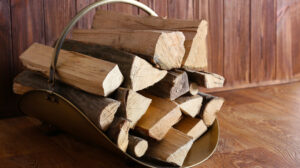
Proper Wood Storage
To keep your wood dry and ready for use, store it in a well-ventilated area protected from rain and snow. Use a firewood rack or stack it off the ground to promote airflow and prevent decay.
Cover woodpiles with a tarp or detachable roof to protect them from precipitation. Allow 1-2 years of drying time for optimal low moisture content. Store wood uphill from your home to prevent pest infestations. Stack wood neatly in a crisscross pattern for stability.
Avoiding Green or Treated Wood
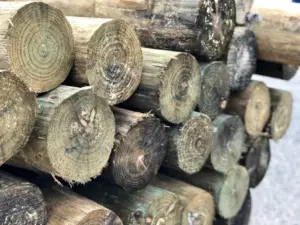 Green or freshly cut wood, as well as wood treated with chemicals, should be avoided. Green wood contains high moisture content, resulting in inefficient burning and increased creosote buildup. Treated wood may release toxic fumes when burned.
Never burn wood with paint, stains, or preservatives. These can release hazardous chemicals and damage your stove and chimney. Only use untreated natural hardwoods for fuel. Burning wet or treated wood also wastes energy trying to evaporate moisture.
Proper Stove Installation
To ensure the safe and efficient operation of your Homesteader Wood Stove, proper installation is essential. Consider the following steps:
Compliance with Local Regulations
Before installing your wood stove, familiarize yourself with local building codes and regulations. These may include requirements for clearance distances, venting systems, and chimney height. Adhering to these guidelines will guarantee a safe installation.
Consult your local fire marshal for wood stove regulations. Many areas require permits and inspections for new stove installations. Check insurance policies which may stipulate wood stove requirements.
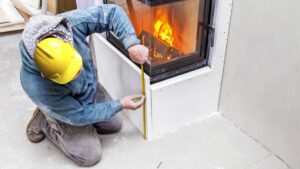
Professional Installation
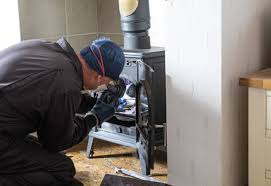
 Unless you have extensive experience, it is highly recommended to hire a professional for the installation of your Homesteader Wood Stove. A professional installer will ensure proper positioning, secure venting, and comply with safety standards.
Look for an NFI-certified wood stove installer for expertise. Improper installation can lead to fires or carbon monoxide poisoning. Ask for references from previous stove installation jobs.
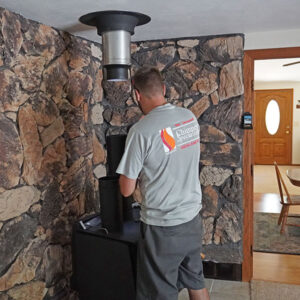
Venting and Chimney Considerations
For effective venting, install a high-quality chimney that extends above the roofline. The chimney should be inspected and cleaned regularly to prevent blockages and ensure optimal airflow.
Use UL-rated Class A chimney pipes for durability and safety. The chimney height should be at least 3 feet above the roof ridge. A taller chimney provides more draft for improved performance.
Lighting the Wood Stove
Properly lighting your Homesteader Wood Stove sets the foundation for a successful and efficient fire. Follow these steps:
Clearing the Ashes
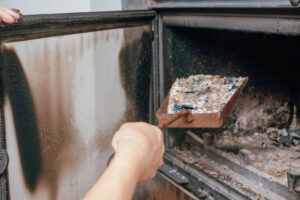 Before starting a new fire, remove any remaining ashes from the previous burn. This allows for better airflow and combustion.
Let ashes cool completely before disposing in a metal bucket. Leave a thin layer of ash to insulate the stove bottom and prevent overheating. Wear protective gloves when handling ashes to prevent burns.
Building a Fire
Begin by placing crumpled newspaper or fire starters at the base of the firebox. Add small pieces of dry kindling on top, creating a pyramid shape. Light the newspaper or fire starters and let the kindling catch fire.
Use hardwood kindling no thicker than 1 inch for quick ignition. Make sure the damper is fully open before lighting the fire. Gradually add larger kindling as the fire builds. Keep a close eye on the fire when first lighting it.
Adding Larger Wood
 Once the kindling has caught fire and is burning steadily, gradually add larger pieces of seasoned hardwood to the fire. Avoid overcrowding the stove, as it can hinder proper airflow.
Add progressively larger split logs once the kindling is fully engaged. Place logs compactly but allow space for air circulation. Use a log holder tool to safely add wood. Start with smaller diameter logs first.
Adjusting the Airflow
The airflow controls on your Homesteader Wood Stove play a crucial role in maintaining the desired temperature and combustion efficiency. Here’s how to adjust them effectively:
Primary Air Intake
 The primary air intake is responsible for igniting and sustaining the fire. For a hotter and more intense fire, open the primary air control fully. To slow down the burn rate and conserve wood, partially close the primary air intake.
Let the fire establish before closing the primary air control. Monitor the flame and reopen if it starts to die down. The primary control is located near the door.
Secondary Air Intake
The secondary air intake allows for the complete combustion of gases and particulates, resulting in cleaner emissions. Adjust the secondary air control to balance heat output and efficiency.
Keep secondary air open for the first 30 minutes of the fire. Slowly close it to avoid excess air and overheating the stove. The secondary air inlet is above the glass door.
Managing the Fire
Once the fire is burning steadily, it’s important to manage it properly for optimal heat output and efficiency. Consider the following tips:
Loading Wood
 When adding more wood to the fire, avoid placing it directly on top of burning embers. Instead, position the wood towards the back of the firebox to allow proper airflow and encourage complete combustion.
Arrange wood pieces parallel to each other for efficient burning. Add more wood when the flames start diminishing. Add wood before the fire gets too low.
Controlling the Draft
By adjusting the damper or draft control, you can regulate the intensity of the fire. Opening the damper increases airflow and heat output while closing it reduces the burn rate and conserves wood.
Close the damper halfway to maintain a steady, low-heat fire. Adjust in small increments to fine-tune the burn rate. The draft control regulates chimney draw.
Maintaining the Wood Stove
Regular maintenance ensures the longevity and efficient operation of your Homesteader Wood Stove. Here are some essential maintenance tasks:
Removing Ashes
Regularly remove ashes from the firebox, as excessive accumulation can restrict airflow and reduce heat output. Dispose of the ashes in a metal container and store them outside away from flammable materials.
Inspect and remove ashes after each fire for best performance. Let the stove fully cool before removing ashes to prevent accidental burns. Only remove ashes when the stove is cold.
Inspecting and Cleaning
 Inspect the stove for any signs of damage or wear. Clean the exterior surfaces regularly using a mild detergent or stove cleaner. Check the door gaskets and replace them if they are worn out or damaged.
Wipe down surfaces weekly to prevent buildup and rust. Inspect for cracks or warping which can compromise safety. Use a wire brush to scrub stubborn creosote deposits.
Cleaning and Chimney Maintenance
A clean chimney is vital for safe and efficient wood stove operation. Follow these steps for proper cleaning and maintenance:
Chimney Cleaning Frequency
Schedule a professional chimney cleaning at least once a year, or more frequently if you use your Homesteader Wood Stove extensively. This will remove creosote buildup and ensure proper ventilation.
Inspect the chimney monthly for creosote accumulation. Clean the chimney after every 1-2 cords of wood burned. Look for blockages like bird nests or leaves.
Creosote Removal
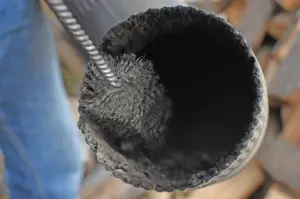 Creosote is a byproduct of wood combustion and can accumulate inside the chimney. To prevent chimney fires, consider using creosote-reducing additives or installing a creosote removal system.
Use chemical or mechanical methods to control creosote buildup. Have a chimney sweep perform a Level 2 inspection annually. Burning hot fires helps minimize creosote.
Maximizing Efficiency
To maximize the efficiency of your Homesteader Wood Stove and reduce wood consumption, consider implementing these measures:
Using a Heat-powered Fan
A heat-powered fan, placed on top of the wood stove, circulates warm air more efficiently throughout the room. This can lead to faster and more even heat distribution.
Position fans above the stove to push heat into living spaces. Select variable speed fans to customize airflow. Fans increase heat transfer efficiency by up to 25%.
Insulating the Chimney
 Insulate the chimney to minimize heat loss and maximize the heat transfer into your living space. Chimney insulation sleeves or blankets can be installed to retain more heat.
Choose insulation rated for high temperatures, like ceramic wool. Verify insulation meets local fire codes before installing. Use insulation with at least an R-value of 6.
Using the Wood Stove for Cooking
In addition to providing heat, a Homesteader Wood Stove can be utilized for cooking. Here’s how:
Choosing Cookware
Select cookware that is suitable for wood stove cooking, such as cast iron or stainless steel. These materials distribute heat evenly and can withstand high temperatures.
Use flat-bottomed pans and pots to maximize contact with the stovetop. Look for cookware with oven-safe handles. Cast iron retains heat well for even cooking.
Utilizing the Stove Top
 The flat surface of the wood stove can be used as a cooktop. Place a sturdy trivet or cooking grate on the stovetop to support your pots and pans.
Keep a kettle of water boiling on the stovetop for beverages. Monitor cookware carefully to prevent scorching. The stovetop can reach over 600°F for fast heating.
Additional Tips and Tricks
Here are some additional tips and tricks to enhance your experience with a Homesteader Wood Stove:
Using Fire Starters
To simplify the fire-starting process, consider using commercial fire starters or homemade alternatives, such as wax-coated pinecones or cardboard dipped in wax.
Store fire starters in a waterproof container for quick access. Opt for non-toxic and chemical-free fire starter options. Paraffin fire starters are an affordable option.
Storing Firewood Indoors
 To ensure dry and readily available firewood, store a small amount indoors, preferably near the wood stove. This way, the wood will be warm and dry, promoting efficient burning. Keep a canvas wood carrier stocked for fueling the fire. Position wood storage at least 36 inches from the stove. Storing wood indoors reduces the time spent retrieving logs outdoors.
Conclusion
In conclusion, using a Homesteader Wood Stove can provide you with reliable heat and a cozy atmosphere. By following safety precautions, choosing the right wood, properly installing and maintaining the stove, adjusting airflow, and managing the fire, you can enjoy efficient and enjoyable wood stove heating. Additionally, with the option of wood stove cooking and implementing tips and tricks, your Homesteader Wood Stove becomes a versatile and valuable asset for your home or homestead.
Frequently Asked Questions (FAQs)
Q1: Can I leave my Homesteader Wood Stove unattended?
A1: It is not recommended to leave your Homesteader Wood Stove unattended for extended periods of time. While the stove is designed to be safe and efficient, it is always best to exercise caution and ensure someone is present to monitor the fire. Unattended wood stoves can pose a fire risk and may result in overheating or other potential hazards.
Q2: How often should I clean the chimney?
A2: Chimney cleaning frequency depends on several factors, including how frequently you use your wood stove and the type of wood you burn. As a general guideline, it is advisable to have your chimney professionally cleaned at least once a year. However, if you notice significant creosote buildup or experience decreased draft, it is recommended to clean the chimney more frequently.
Q3: Is it safe to cook on a wood stove?
A3: Yes, it is safe to cook on a Homesteader Wood Stove. In fact, wood stoves have been used for cooking purposes for generations. However, it is important to use proper cookware and exercise caution while cooking. Ensure that your cookware is suitable for high temperatures and that you take necessary precautions to avoid burns or accidents. Always monitor the cooking process and make sure the stove is stable and secure.
Q4: What is the lifespan of a Homesteader Wood Stove?
A4: The lifespan of a Homesteader Wood Stove can vary depending on various factors, including usage, maintenance, and quality of installation. With proper care and regular maintenance, a high-quality wood stove like the Homesteader can last for several decades. However, it is important to keep an eye out for signs of wear and tear, such as cracks, corrosion, or damaged components. If any issues arise, it is best to consult a professional for repairs or replacements.
Q5: Can I use softwood in my wood stove?
A5: While it is possible to use softwood in your wood stove, it is generally not recommended. Softwoods like pine or spruce tend to burn faster and produce less heat compared to seasoned hardwoods. They also contain higher moisture content, leading to increased creosote buildup and potentially reduced efficiency. It is best to stick to well-seasoned hardwoods like oak, maple, or birch for optimal performance and cleaner combustion in your Homesteader Wood Stove.