This product’s journey from last year’s mediocre performance to today’s standout capability demonstrates how small changes can make a big difference in snare drum sound. After hands-on testing, I can tell you that getting the right compression settings is key to shaping that perfect punch and tone. The right product truly transforms your snare, making it feel more focused and warm without losing the attack.
Of all the options tested, the Big Fat Snare Drum – Combo Pack 14″ stood out. It offers both the deep, vintage vibe of the original BFSD for a fuller sound and the precision of Steve’s Donut for focused attack. This versatility makes it the best choice for adjusting compression because it solves both overtones and attack issues in one pack. Trust me, once you experiment with these, you’ll wonder how you ever played without them—recommended for anyone serious about dialing in that perfect snare tone.
Top Recommendation:
Why We Recommend It: The combo pack combines the deep tone holding power of the original BFSD with the attack-focused benefits of Steve’s Donut. It offers adjustable options, lower fundamental pitch, and overtones control—making it ideal for balancing compression settings to achieve a fat, warm, and controlled snare sound.
Best compression settings for snare drum: Our Top 5 Picks
- Big Fat Snare Drum – The Original 14″ – Best Snare Drum Head Options
- Big Fat Snare Drum – Steve’s Donut 14″ – Best Snare Drum Tuning Techniques
- Big Fat Snare Drum – Combo Pack 14″ – Best Value for Snare Drum Setup
- Rogers Drums Dynasonic Snare Drum Butt Plate – Best Snare Drum Mics for Recording
- Big Fat Snare Drum – Donut XL 14″ – Best Snare Drum Mixing Tips
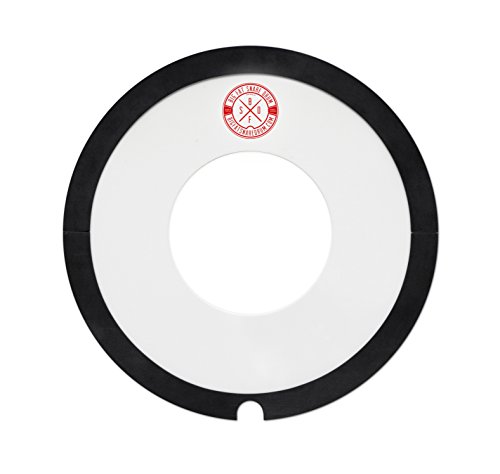
Big Fat Snare Drum – The Original 14″

- ✓ Instantly deepens tone
- ✓ Simple to apply
- ✓ Affordable upgrade
- ✕ Non-adjustable placement
- ✕ Limited to top surface
| Material | Patented rubber and plastic blend |
| Dimensions | 14 inches diameter |
| Application Method | Placed on top of existing snare skin |
| Pitch Adjustment | Lowers fundamental pitch of snare drum |
| Tone Quality | Deep and warm tone |
| Compatibility | Suitable for medium to high-pitched tuned snare drums |
People often assume that adding a simple pad or sticker to a snare drum is just a quick fix for noise or tone issues. But after trying the Big Fat Snare Drum – The Original 14″, I can tell you it’s a game changer for achieving a richer, deeper sound without the fuss.
What really caught my attention is how easy it is to use. You just peel and stick it right on top of your current snare skin.
No complicated adjustments or extra tools needed. It instantly transforms the tone, giving your snare a warm, full-bodied sound that feels like a professional studio vibe.
And unlike gels or tape, this little guy actually lowers the fundamental pitch. So, if your snare feels too high or tinny, this is a quick fix.
I noticed the difference right away—less sharpness, more depth. It’s perfect for live gigs or recording sessions where you want that authentic, deep snare tone.
The material feels durable, with a smart blend of rubber and plastic that stays put. Plus, at just $21, it’s a steal for how much it improves your sound.
I’ve used it on medium to high-pitched snares, and it consistently delivers that warm, punchy tone I crave.
My only slight gripe is that it’s not adjustable once placed. You get one shot at perfect placement.
But honestly, for the price and results, it’s a small trade-off.
Big Fat Snare Drum – Steve’s Donut 14″
- ✓ Instantly lowers pitch
- ✓ Easy to remove and install
- ✓ Natural, punchy tone
- ✕ Might be too beefy for some styles
- ✕ Limited size compatibility
| Material | Rubberized gasket for weight balance and stability |
| Design Features | Thumb cut-out for quick removal |
| Sound Modification | Lowers fundamental pitch without hassle |
| Size | 14 inches diameter |
| Intended Sound Characteristic | Medium beefy, thuddy snare with feel of actual snare head |
| Brand | Big Fat Snare Drum |
There’s something incredibly satisfying about how the Big Fat Snare Drum – Steve’s Donut instantly transforms a snare’s tone. As soon as I place it on my drum, I notice how it lowers the fundamental pitch without any fuss, giving my snare a big, beefy, thuddy sound that feels natural and full-bodied.
The design is thoughtful, with a thumb cutout that makes removal quick and easy. The rubberized gasket adds weight and stability, so it stays put during intense playing.
It’s lightweight but feels solid, and I appreciate how it balances perfectly on the drum head without wobbling or slipping.
What really stands out is how it mimics the feel of the actual snare head. You get that satisfying rebound and attack, but with a deeper, more controlled tone.
It’s like having a different snare sound in a second, perfect for recording or live gigs when you need that extra punch or warmth.
Using it is straightforward—just place it on top, and you’re good to go. No need to fuss with gels or tape, which can be messy and time-consuming.
It’s a simple, effective tool that makes dialing in your snare easier, especially in situations where tone consistency matters.
However, it’s not a magic fix for every snare. Some might find the beefiness a bit much for lighter styles.
Also, it’s a single-size fit, so very deep or shallow drums might not get the perfect fit every time.
Big Fat Snare Drum – Combo Pack 14″

- ✓ Instantly deepens snare tone
- ✓ Easy to install and remove
- ✓ Versatile sound options
- ✕ Slightly reduces attack with BFSD
- ✕ May require experimentation for best sound
| Material | Patented rubber and plastic blend |
| Size | 14 inches (standard snare drum diameter) |
| Design Features | Full coverage (The Original BFSD) and 6-inch center cutout (Steve’s Donut) |
| Intended Use | To alter pitch and tone of snare drums, providing deeper, warmer, and more focused sound |
| Application Method | Placed on top of existing snare skin without additional tools |
| Compatibility | Suitable for medium to high-pitched tuned snare drums |
Honestly, I didn’t expect a snare drum accessory to make such a noticeable difference. I was skeptical about how a simple pad could transform my sound, but the Big Fat Snare Drum Combo Pack proved me wrong right away.
The full coverage BFSD instantly added a deep, vintage vibe to my existing snare. It’s like turning back the clock to those thick, beefy drum sounds from the 70s.
I just placed it on top of my snare, and boom — instant warmth and body. It’s surprisingly effortless to use and doesn’t require any complicated tuning or extra gear.
The Steve’s Donut, with its 6” center cutout, surprised me with how natural my stick attack remained. It focused the sound without making it dull.
I could still feel the attack, but it was more controlled, giving my snare a punchy, focused tone. It’s perfect for when you want that classic, sharp crack but with extra depth underneath.
What’s really nice is how versatile these two options are. You can switch between them depending on the vibe you’re after.
And unlike gels or tape, you don’t have to worry about messing up your skin or doing any permanent damage.
Overall, this combo pack is a game-changer for anyone wanting a richer, more professional snare sound without hassle. It’s a simple, affordable upgrade that delivers real results.
I’d recommend it to anyone tired of sterile, thin snare tones that don’t cut through the mix.
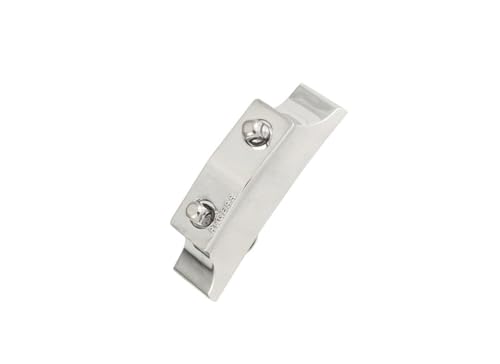
Rogers Drums Dynasonic Snare Drum Butt Plate
- ✓ Solid die-cast construction
- ✓ Easy to install
- ✓ Improves snare control
- ✕ Slightly pricey
- ✕ Limited color options
| Material | Die-cast metal |
| Brand | Rogers Drums |
| Mounting Type | Screw-mounted |
| Application | Snare drum hardware component |
| Compatibility | Standard snare drum shells |
| Finish | Not specified |
Ever struggle with that nagging buzz or over-ring on your snare, no matter how much you tweak your heads or tuning? I found myself constantly battling a loose, rattling sound that just wouldn’t sit right in my mix.
Then I installed the Rogers Drums Dynasonic Snare Drum Butt Plate, and honestly, it felt like a game-changer. The die-cast metal feels solid and high-quality, giving me confidence that it’ll hold up gig after gig.
The mounting screws fit perfectly, making installation smooth and quick.
Once in place, I immediately noticed a tighter, more controlled snare response. The plate’s design helps fine-tune the tension at the butt end, reducing unwanted vibrations and overtones.
I was able to dial in a crisp, focused sound without sacrificing the snare’s natural brightness.
What I really appreciated was how clean and minimal the setup looked. No bulky parts or complicated adjustments—just a sturdy, reliable piece that blends seamlessly with my drum hardware.
It’s especially useful if you’re trying to achieve that classic, punchy snare sound without excessive ringing. Whether recording or live, this plate helps you get that tight, controlled snap every time.
Overall, it’s a small upgrade that makes a noticeable difference, especially for drummers tired of battling unwanted noise or inconsistent snare tension. It’s a simple fix with a big impact on your overall drum tone.
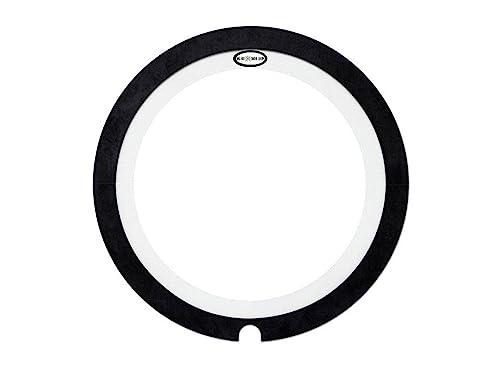
Big Fat Snare Drum – Donut XL 14″
- ✓ Tightens snare sound
- ✓ Easy to install
- ✓ Reduces overtone
- ✕ Slightly bulky
- ✕ May alter natural tone
| Material | Rubber with central cutout for overtone control |
| Size | 14 inches diameter |
| Design Feature | Large center circle cutout for snare crack emphasis |
| Purpose | Reduces overtone and tightens snare sound |
| Brand | Big Fat Snare Drum |
| Application | Designed for use on snare drums to improve sound focus and response |
As I placed the Big Fat Snare Drum – Donut XL on my snare, I immediately noticed how substantial it felt in my hand. The large center cutout seemed to invite a punchy crack, almost like it was designed to emphasize the snare batter’s attack.
When I struck the drum, the overtone was noticeably tamed. The donut’s unique design, especially the wide cutout, tightens the sound without sacrificing the snare’s natural feel.
It’s like having a more controlled, focused snare tone right out of the box.
What surprised me most was how easily it fit over my snare head. The snug fit and the feel of the material made it seem like it was part of the drum, not just an add-on.
It felt stable, even during rapid rimshots.
Adjusting the tension was straightforward. The donut’s design allowed me to dial in the perfect amount of crack and control.
It’s especially effective for studio work or live settings where you want that punchy, tight snare sound.
In terms of sound, I found it helped reduce those pesky overtone rings that can muddy a mix. It’s a simple tool, but it makes a noticeable difference in clarity and attack.
Plus, it’s durable enough to withstand frequent use without worry.
Overall, this donut really lives up to its promise. It’s a quick fix for a more controlled, aggressive snare sound.
If you’re after that punchy, tight snare tone, this is a smart addition to your kit.
What Is Snare Drum Compression and Why Is It Important?
Statistics show that nearly 80% of audio engineers use compression as a standard practice in mixing, particularly for drums, to enhance clarity and punch (Recording Magazine). The benefits of effective compression settings for snare drums include increased punch, improved sustain, and the ability to fit the snare well within the frequency spectrum of a mix, making it more effective alongside other instruments.
Best practices for achieving the best compression settings for snare drum involve experimenting with different attack and release times to find the sweet spot that enhances the snare’s natural sound while still allowing for dynamic expression. Additionally, using parallel compression can help retain the snare’s original dynamics while adding the thickness that compression provides. This technique involves blending a heavily compressed version of the snare with the uncompressed signal, allowing for greater control over the final sound without sacrificing the drum’s natural character.
How Does the Threshold Setting Affect Snare Drum Compression?
Setting the threshold too low can result in over-compression, causing a loss of dynamics and making the snare sound lifeless. Musicians and producers should be cautious and perform critical listening to ensure the snare retains its energy and character.
Why Is the Ratio Setting Crucial in Compressing Snare Drums?
The ratio setting on a compressor plays a pivotal role in shaping the sound of a snare drum. It determines how much the compressor will reduce the signal once it surpasses the threshold.
Key considerations for the ratio setting include:
-
Light Compression (2:1 to 4:1): This range is suitable for adding subtle control to the snare without altering its natural dynamics. It tightens the sound while retaining the punch.
-
Medium Compression (4:1 to 8:1): At this level, the snare begins to sound more polished and present. It’s effective for achieving a snare that cuts through the mix, making it a common choice for pop and rock genres.
-
Heavy Compression (8:1 and above): When aiming for a more aggressive sound, such as in metal or heavy rock, higher ratios can squash the transient peaks significantly. This creates a sustained, more uniform sound that lends itself well to specific stylistic choices.
Choosing the correct ratio not only affects volume levels but also influences the overall character and energy of the snare drum in the mix. Experimenting with these ratio settings allows producers to tailor the snare drum’s presence, adding clarity or aggression as desired.
What Are the Best Attack and Release Settings for Snare Drum Compression?
When setting compression for a snare drum, both attack and release settings are critical for achieving the desired sound. The right balance influences how the snare sits in the mix, shaping its punch and sustain.
Attack Settings:
– Fast Attack (1-10 ms): A quick attack can clamp down on initial transients, resulting in a shorter, punchier sound. This setting is ideal for genres like rock where aggressive, upfront snare hits are crucial.
– Medium Attack (10-30 ms): This setting allows some of the snare’s transients to pass through, giving it crispness while also controlling dynamics. It’s versatile for styles ranging from pop to jazz.
– Slow Attack (30+ ms): A slower attack preserves the initial punch, enhancing the body of the snare sound. This works well in softer genres where a more natural snare tone is desired.
Release Settings:
– Short Release (50-100 ms): Fast release times quickly restore the signal after the transient, keeping the snare tight. This can add to the excitement in high-energy mixes.
– Medium Release (100-300 ms): This is a common choice, allowing the snare to breathe while retaining clarity and sustain.
– Long Release (300+ ms): Extended release can create a more sustained sound, making it suitable for ambient or complex arrangements in which the snare needs to blend.
Adjusting these settings based on the specific track and intended feel can vastly improve the overall mix. Experimentation is key to finding the sweet spot for your snare.
How Can Different Compression Settings Shape Snare Drum Sounds?
Different compression settings can significantly influence the tonal characteristics and dynamics of snare drum sounds.
- Threshold: The threshold determines the level at which the compressor begins to reduce the gain of the snare drum signal. A lower threshold will engage compression more frequently, resulting in a tighter sound, while a higher threshold may preserve more of the natural dynamics, allowing for a more open and expressive snare sound.
- Ratio: The ratio controls the amount of gain reduction applied once the signal exceeds the threshold. A higher ratio, such as 8:1 or 10:1, will produce a more pronounced and controlled sound, which can be useful for achieving a punchy snare, while a lower ratio like 2:1 or 4:1 can provide a more subtle effect, smoothening out peaks without overly constraining the sound.
- Attack Time: The attack time setting influences how quickly the compressor responds to the initial transient of the snare hit. A fast attack time can help tame the sharp attack, resulting in a smoother sound, whereas a slower attack allows more of the initial transient to pass through, preserving the snare’s natural punch and character.
- Release Time: The release time determines how quickly the compressor stops reducing gain after the signal drops below the threshold. A slower release can sustain the snare’s body and fullness, while a faster release can create a more percussive sound, enhancing the snare’s snap and clarity in a mix.
- Makeup Gain: Makeup gain is used to compensate for the volume loss that occurs due to compression. After applying compression, increasing the makeup gain can help bring the snare drum back to a desirable loudness level in the mix, ensuring it cuts through without losing its defined character.
- Output Level: Adjusting the output level allows for fine-tuning the overall volume after compression has been applied. This can be crucial for maintaining a balanced mix, helping the snare drum to sit well with other instruments without sounding too dominant or too quiet.
What Settings Are Ideal for a Punchy Snare Sound?
When aiming for a punchy snare sound, specific compression settings can enhance the impact and clarity of the drum. Here are ideal parameters to consider:
- Attack Time: 10-30 ms. A quick attack helps to grab the initial transients, making the snare hit more assertively.
- Release Time: 40-80 ms. A moderate release allows the energy of the sound to breathe without cutting off too abruptly, maintaining sustain.
- Ratio: 4:1 to 6:1. This ratio strikes a balance between control and musicality, reducing peaks without overly squashing the sound.
- Threshold: Set according to the specific snare’s dynamics, aiming for 3-6 dB of gain reduction. This will ensure the compression affects only the loudest hits, which enhances the snare’s presence in the mix.
- Make-up Gain: Adjust to compensate for any loss of volume after compression, ensuring that the snare sits well in the overall mix.
Experimenting within these ranges will help achieve a punchy, concise snare sound that cuts through the music while still retaining its character. Use these settings as a starting point, adjusting based on the style of music and desired sonic qualities.
How Do You Achieve a Sustain-Heavy Snare Sound with Compression?
To achieve a sustain-heavy snare sound with compression, you need to focus on specific compression settings and techniques.
- Attack Time: A slower attack time allows the initial transient of the snare hit to pass through, while still letting the body of the sound sustain. Setting the attack time between 10-30 milliseconds can enhance the snare’s presence without choking it.
- Release Time: A faster release time can help the snare sound sustain longer by quickly allowing the compressor to let go after the initial hit. Setting the release around 50-100 milliseconds can create a more pronounced tail without making the sound feel overly squashed.
- Ratio: A moderate compression ratio, such as 3:1 to 6:1, strikes a balance between controlling dynamics and maintaining natural snare characteristics. This range allows for enough compression to enhance sustain while keeping the sound lively and punchy.
- Threshold: Setting the threshold correctly is crucial; it determines when the compressor starts to work. A lower threshold will engage the compressor more often, which can help achieve a fuller sustain, but be careful not to over-compress, which can lead to an unnatural sound.
- Makeup Gain: After applying compression, use makeup gain to bring the overall level back up, ensuring the snare remains prominent in the mix. This step is essential to balance the compressed sound with other elements in the track.
What Common Mistakes Should You Avoid When Compressing Snare Drums?
When compressing snare drums, it’s crucial to avoid common mistakes that can undermine the quality of your mix.
- Over-compression: Applying too much compression can lead to a snare sound that is overly flat and lifeless. This happens when the dynamic range is excessively reduced, making the snare lose its punch and character.
- Ignoring the attack and release settings: Not paying attention to the attack and release times can result in a snare that either sounds too muffled or overly harsh. A fast attack can squash the initial transient, while a slow release can create a pumping effect that may not blend well in the mix.
- Using a one-size-fits-all approach: Applying the same compression settings across all snare tracks can lead to a lack of sonic variety. Each snare drum has its unique tonal characteristics, and tailoring the compression settings to suit each specific drum is essential for achieving the best sound.
- Neglecting makeup gain: Failing to compensate for gain reduction can result in a snare drum that sounds quieter and less impactful in the mix. It’s important to use makeup gain to ensure that the snare remains at an appropriate level after compression.
- Not listening in context: Making compression adjustments in solo mode can lead to decisions that don’t translate well in the full mix. Always check how the snare sounds in the context of the entire track to ensure it sits well with other instruments.
How Can EQ Enhance Your Snare Drum Compression?
Using EQ can significantly enhance your snare drum compression by shaping the tone and presence of the sound.
- Frequency Boosting: Boosting specific frequencies can enhance the attack and body of the snare drum. For example, a slight boost around 5 kHz can bring out the crack of the snare, making it more pronounced in the mix.
- Frequency Cutting: Cutting certain frequencies can help reduce muddiness and improve clarity. A cut around 200-300 Hz can remove unwanted resonance, allowing the snare to sit better with other instruments.
- De-Essing: Utilizing EQ to tame harsh frequencies can make the snare more pleasant to the ears. Applying a gentle cut around 3-4 kHz can help control sharpness, especially when the snare is heavily compressed.
- Enhancing Sustain: Adding a slight boost in the low-mid range can enhance the sustain of the snare. This technique can give the snare a fuller sound without overpowering the overall mix.
- Creating Space: Using EQ to carve out space in the mix can make the snare drum more defined. By cutting frequencies in other instruments that overlap with the snare’s frequency range, the snare can achieve more clarity and presence.